A View of My Garden in a Mirror 2010
Showing posts with label The Patio. Show all posts

Monday, September 24, 2012

Creating A Paver and Pebble Mosaic Patio

When I started this "little" project I never imagined it would take me two summers until it was finally finished. Technically it still needs one more coat of sealer, but for the most part it is finally complete. The reason it took so long was because I was only able to work on it in my spare time which over the last two summers was hit or miss.  Here are photos as I made progress................


Going waaaayyyy back, this is what the area looked like 9 years ago, the first week we moved in.


This is probably a better starting point. I originally planned on using some flagstone as you can see, but I decided to go a different route.


After marking the area with spray paint, we used a sod cutter to remove the grass. The area with the board is a drainage ditch that now has drainage tubing installed for run off.


Due to existing planters and tree roots in the soil, I used large retaining wall blocks to raise the patio and create a shape that would work for the area with the existing hardscape.


After playing with several types of pavers and bricks, I decided that I would have to stain them to use the shapes I wanted. I used plastic edging to keep the pavers in place and buried the retaining wall blocks slightly as well as added concrete to the entire outside to hold them in place later.


This is where I started again the second summer. I finished the exposed aggregate between the pavers on the "sun rays" and just started to try to figure out a pattern for the center. I found a metal wagon wheel at a local scrap yard to use as a circle pattern. I tried using plastic edging but it just did not make a great circle. The pattern you see here is not what I ended up completing. I struggled at this point and it took me about a month to come up with a new direction.


This is after I decided to divide the remaining area with plastic edging into 6 sections. Creating smaller sections made the project less daunting and allowed me to work on them when I had time available. If I had it to do over again I would have made the concrete lower on the edges. I ended up with a lip between each section and I didn't like the way it looked. I used muriatic acid to soften the concrete so I could carve the lip down to make the sections look like they were joined. This certainly wasn't ideal since the acid can weaken the concrete, but it looks much better now. 


This is a picture before I carved the lip down. There is approximately 4-6 inches of gravel as a base. And then another 4" of concrete and then 1-1/2" of mortar. I used the in situ method which means I used the concrete and mortar dry pounding the rocks in place and misted slowly with water afterwards until it was wet all the way through. After trying both methods, using wet and dry concrete/mortar, I preferred the dry method because it allowed me more time to move the rocks around to give them a tight fit. Also, this allowed me to start without an "exact" pattern. I just started playing with the rocks until I liked the way they looked.


Three sections down, three to go. By the way, the inside of the wagon wheel is rainbow gravel and clover shaped pavers. I found old pavers at a local salvage yard so I stained them to match the rest of the patio. This left the option open of doing something else later, but for now we need to use this as a place to set our fire pit. Having the moveable gravel allowed me to keep it level. 


This is after all 6 sections were in place. This was a milestone and we were able to start using the patio with the fire pit at this point. 


A summer evening towards the end of the project.


I filled the gaps between the small gray bricks with polymeric sand. This sand contains polymers so that you don't have weeds growing up between the gaps. I love this stuff and highly recommend it. It becomes so stiff it feels like concrete, yet the water can still penetrate to drain off. The large gaps I filled with stone. The arrows are pointing to the bricks I made with concrete. After struggling to break the bricks into the shape I wanted, and not wanting to deal with renting a wet saw, I decided to make them myself with concrete and stain them to match. I used a skinny concrete trowel to make lines so they look like bricks and filled the lines with sand as well.


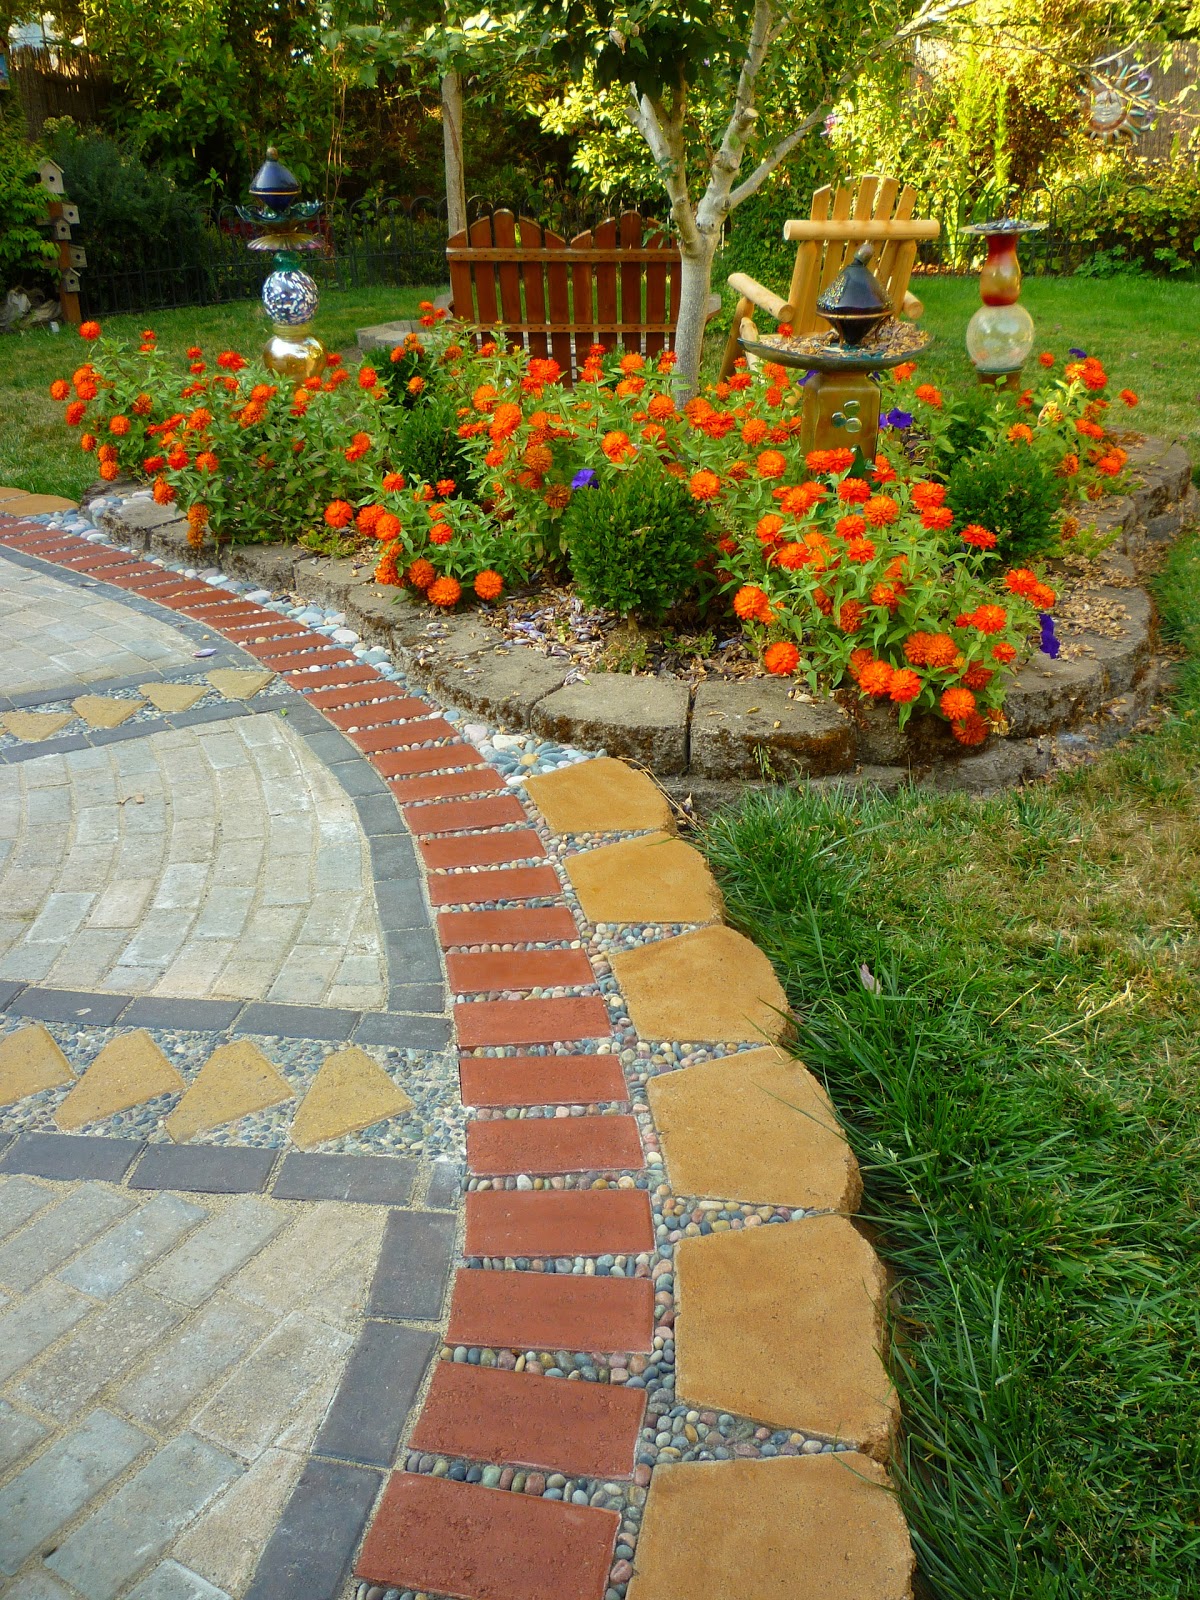
This edge bordered an existing planter so I just filled it in with rocks and a flower pattern.


A close up of the flower pattern. The falling leaves are already starting to get caught between the rocks, but I am not going to sweat it. Let them add to the rustic look of the patio.


A side view of the edge of the patio bordering the existing planter.


The center rock work after one coat of sealer and the fire pit in place.


The finished patio. If you look close you can see the concrete around the edge. I stained this to match as well. It is much more visible in this photo than is noticeable in person. I used a mortar bag to distribute it in a pattern the same shape as the blocks and then smoothed it down with a trowel.


Dinga taking a break on the patio.


This is a tough area to photograph because it is usually half sun, half shade or all shade so the colors don't always turn out as they actually are in real life.
 

This is probably the best representation of the colors. This was taken in the early morning. It is such a relief to have this finished. I really dislike having unfinished projects and this one just kept going on and on and on! But......do you see the grass area in the front of the patio? I have a stack of pavers that are waiting to go in next year, as well as a path leading to the patio and the garden and maybe just a little more mosaic pebble work. Less grass to water and maintain is a good thing! 

Thursday, September 23, 2010

Our Tropical Patio and the Oregonian with Kym Pokorny

Hey look! Our patio picture made the Home and Garden section of the Oregonian with Kym Pokorny! She is my idol! If you have time browse through her articles and blog.  She is great!

http://blog.oregonlive.com/kympokorny/2010/09/inspiration_to_go_readers_shar.html

If I had known the picture I sent would actually be published I would have straightened out the cushions a bit and taken the coleus that I was trying to root off the table! Oops!  Here are some more pictures!

Most of the trinkets on the wall are from our trips to Mexico. I am sure when we are traveling through the marketplace with our arms full of our "loot" for the day, they are thinking "those crazy Americans, what are they going to do with all of that junk". Stick it on the walls of course, so we can remember the great time we had! We love Mexico, especially the people, they are always so happy.


See the coleus on the table? That is the top off the coleus from the window box above. It grew like mad this summer and kept blocking our view out the window. So I lopped off the top several times and once it grew roots I stuck it in a pot and it did amazingly well. Kind of like cut flowers that grow after you cut them, pretty cool!


Yes, that is an authentic lantern from "Off Mosquito Repellant." Hey I like them and they keep the bugs away. Well, sort of. The elephant on the ground in the back is a fountain that my husband gave me for Christmas a few years ago. We had it on the deck but it sounded like someone was peeing in a toilet when the water landed in the pot, so we decided to use it as a decoration for now. And maybe some day down the road it will be in a pond in the yard so the neighbors can enjoy the sound. (Just kidding) I love it, thanks honey!


An amazing fuschia in the foreground from Fry Road Nusery.

Ok, so the Oriental Lamp doesn't exactly go with the "Mexicana" theme, but I saw it in a shop in Port Townsend and had to have it.


And, this isn't the patio, but it is the view from the patio, does that count?


The concrete was acid stained a few years ago and I have applied at least 8 coats of sealer to that puppy. The dirt doesn't have a chance!


Here is Keith enjoying the patio pretending that I am not taking a picture. He is the one in the back not the one on the stick, that is me in spirit!


  And this is my hubby Keith's favorite place to relax with a dog or two joining him.


 Allright, so the Totem Pole really isn't Mexicana either, but I saw it at Big Lots and you know "I had to have it". 

And yes Tim, it is VERY busy!!