When I started this "little" project I never imagined it would take me two summers until it was finally finished. Technically it still needs one more coat of sealer, but for the most part it is finally complete. The reason it took so long was because I was only able to work on it in my spare time which over the last two summers was hit or miss. Here are photos as I made progress................
Going waaaayyyy back, this is what the area looked like 9 years ago, the first week we moved in.
This is probably a better starting point. I originally planned on using some flagstone as you can see, but I decided to go a different route.
After marking the area with spray paint, we used a sod cutter to remove the grass. The area with the board is a drainage ditch that now has drainage tubing installed for run off.
Due to existing planters and tree roots in the soil, I used large retaining wall blocks to raise the patio and create a shape that would work for the area with the existing hardscape.
After playing with several types of pavers and bricks, I decided that I would have to stain them to use the shapes I wanted. I used plastic edging to keep the pavers in place and buried the retaining wall blocks slightly as well as added concrete to the entire outside to hold them in place later.
This is where I started again the second summer. I finished the exposed aggregate between the pavers on the "sun rays" and just started to try to figure out a pattern for the center. I found a metal wagon wheel at a local scrap yard to use as a circle pattern. I tried using plastic edging but it just did not make a great circle. The pattern you see here is not what I ended up completing. I struggled at this point and it took me about a month to come up with a new direction.

This is after I decided to divide the remaining area with plastic edging into 6 sections. Creating smaller sections made the project less daunting and allowed me to work on them when I had time available. If I had it to do over again I would have made the concrete lower on the edges. I ended up with a lip between each section and I didn't like the way it looked. I used muriatic acid to soften the concrete so I could carve the lip down to make the sections look like they were joined. This certainly wasn't ideal since the acid can weaken the concrete, but it looks much better now.

This is a picture before I carved the lip down. There is approximately 4-6 inches of gravel as a base. And then another 4" of concrete and then 1-1/2" of mortar. I used the in situ method which means I used the concrete and mortar dry pounding the rocks in place and misted slowly with water afterwards until it was wet all the way through. After trying both methods, using wet and dry concrete/mortar, I preferred the dry method because it allowed me more time to move the rocks around to give them a tight fit. Also, this allowed me to start without an "exact" pattern. I just started playing with the rocks until I liked the way they looked.

Three sections down, three to go. By the way, the inside of the wagon wheel is rainbow gravel and clover shaped pavers. I found old pavers at a local salvage yard so I stained them to match the rest of the patio. This left the option open of doing something else later, but for now we need to use this as a place to set our fire pit. Having the moveable gravel allowed me to keep it level.
This is after all 6 sections were in place. This was a milestone and we were able to start using the patio with the fire pit at this point.
A summer evening towards the end of the project.
I filled the gaps between the small gray bricks with polymeric sand. This sand contains polymers so that you don't have weeds growing up between the gaps. I love this stuff and highly recommend it. It becomes so stiff it feels like concrete, yet the water can still penetrate to drain off. The large gaps I filled with stone. The arrows are pointing to the bricks I made with concrete. After struggling to break the bricks into the shape I wanted, and not wanting to deal with renting a wet saw, I decided to make them myself with concrete and stain them to match. I used a skinny concrete trowel to make lines so they look like bricks and filled the lines with sand as well.
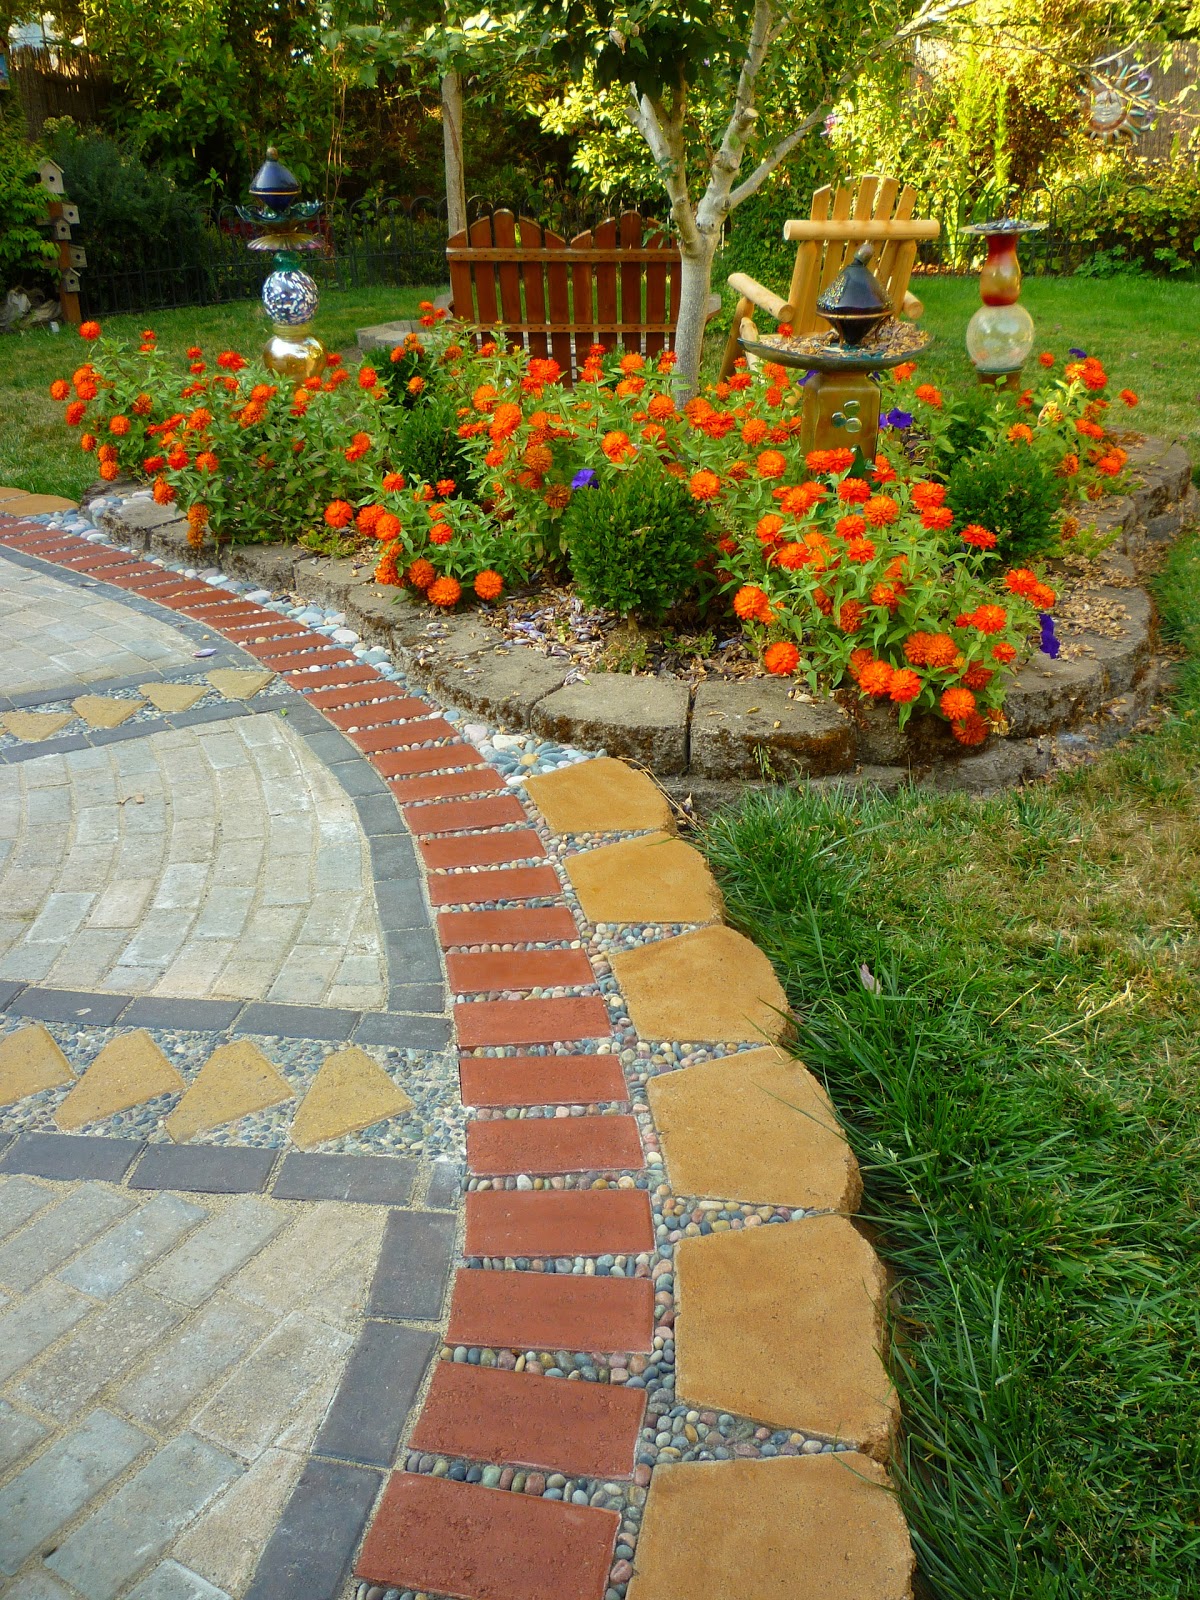
This edge bordered an existing planter so I just filled it in with rocks and a flower pattern.
A close up of the flower pattern. The falling leaves are already starting to get caught between the rocks, but I am not going to sweat it. Let them add to the rustic look of the patio.
A side view of the edge of the patio bordering the existing planter.
The center rock work after one coat of sealer and the fire pit in place.
 The finished patio. If you look close you can see the concrete around the edge. I stained this to match as well. It is much more visible in this photo than is noticeable in person. I used a mortar bag to distribute it in a pattern the same shape as the blocks and then smoothed it down with a trowel.
 Dinga taking a break on the patio.
This is a tough area to photograph because it is usually half sun, half shade or all shade so the colors don't always turn out as they actually are in real life.
This is probably the best representation of the colors. This was taken in the early morning. It is such a relief to have this finished. I really dislike having unfinished projects and this one just kept going on and on and on! But......do you see the grass area in the front of the patio? I have a stack of pavers that are waiting to go in next year, as well as a path leading to the patio and the garden and maybe just a little more mosaic pebble work. Less grass to water and maintain is a good thing!


 Dinga taking a break on the patio.


Wow, Annie, that is an amazing transformation!
ReplyDeleteWhat a fantastic job! Very inspiring. I really love your mosaic sections. The whole patio is a work of art.
ReplyDeleteEnjoy ~ FlowerLady Lorraine
Pretty amazing project. You are probably glad to have it finished so that you can now enjoy the new patio. There is so much detail in the design that visitors will have a lot to keep their eye busy and entertained. The pation is beautiful.
ReplyDeleteWow! Your patio is fabulous, and that is no exaggeration. Well done!
ReplyDeleteBravo, Annie girl. I'm going to alert the team and have them come see the photos. They look wonderful. I am so, incredibly impressed with your work. You are such an amazing talent. It's an honor to know you.
ReplyDeleteIt's well and truly worth all your hard work. It's amazing.
ReplyDeleteThat is incredible! Thank you for all the detailed information. You guys should be really proud of yourselves. It's truly beautiful!
ReplyDeleteThanks All, I am so glad it is finally done! I kept reading that if you want to try your hand at pebble mosaics to start small, like a stepping stone or something. Of course I didn't listen, unless you consider this one giant sized stepping stone! :)
ReplyDeleteOh, Annie! I am speechless and incredibly impressed by what you've done. The finished work of art adds a priceless dimension to your gorgeous home and looks absolutely stunning! Such talent and such an eye for colour and for precisely what works with what. You really are amazingly gifted. Thank you for sharing your creative process with us and for inspiring the rest of us to try to be more adventurous in our own gardens.
ReplyDeleteDesiree! So good to hear from you. I hope all is well with you and your pack! Your spring weather must be getting ready to start as we head into our fall season. I hope you get a chance to keep us all updated with your blog. I think it's good you took time out but a teaser now and then would be fun to see! Big Hug from the other side of the globe! Annie
ReplyDeleteWOW!!! That is incredible! I love that you did this yourself. I also love that you didn't give up on the process. So beautiful!!
ReplyDeleteexcellent photos and explanation. i'd felt overwhelmed wanting to install huge fussy pebble mosaic patios and paths, and you combined less pricey materials with sections of pebbly goodness. and thank you for permission to paint our drab 1967 ranch house brightly.
ReplyDeleteGreat help, thanks for sharing such a nice pics and information.. I like your post. Really good work. keep it up.
ReplyDeletefire pit, patio
Hi -You did an amazing job creating your beautiful patio. I have a ton of pavers in different sizes and shapes that I'm about to use for my patio...which is why I searched and found the link to your project. I know there are a lot of products to stain concrete -and I'm wondering what you used and would recommend. Thanks for sharing all of your information...your project is an inspiration!
ReplyDeleteYour patio is amazing. I have a ton of pavers in different sizes, shapes and colors- and want to do something similar...which is how I found your site. There are many stains available -and I'm wondering what you used and recommend. Thanks for the inspiration -and for sharing all of the information about your beautiful project!
ReplyDeleteI used Behr Semi-transparent concrete stain in the standard colors and then mixed them together to get the colors I liked. I don't remember the exact names, but the Red, Gold, Brown, Black,and Blue tones are what I started out with before mixing them. After that I applied Wet Look Sealer to the rock and pavers. Don't apply the sealer until you are sure that you have finished with the rock and stain. I have actually used the gold & red tone concrete stain on flat rocks that were not quite as vibrant I wanted them to be. You can't tell that it isn't the natural color of the rock. Good luck!
ReplyDeleteWow -thanks for the quick response. I may be working on my project for quite some time as well. I'm in Southern California...so I won't even have the weather excuses! I know this will be fun, rewarding and I will love the result. Thanks so much for the information...I'll try to send some pics when I'm done.
ReplyDeleteI genuinely loved this brilliant Patio Pavers . Thumbs up for all the designs; specially the flower one.
ReplyDeleteGreat job Annie, it looks fantastic! I am thinking about making a similar patio (much smaller though) and I am curious as to what you used to seal the cracks between the paver stones. Any help?
ReplyDeleteThanks for a very informative article - I am about to embark on a similar project - beside a swimming pool and found your blog very helpful
ReplyDeleteThanks for a really informative article - very helpful for a similar project I am about to start :)
ReplyDeleteWhat an eye catchy paver it has came out! I loved your way of putting colorful stones as a design patterns and the centerpiece you have used. Brick Paver Sealing could be the best option to follow up.
ReplyDeleteThis is absolutely INCREDIBLE. I don't think I have ever seen such a delightful patio. I just started to build one using travertine rock and it's a killer project. I can't wait to be finished.
ReplyDeleteThis is absolutely INCREDIBLE. I don't think I have ever seen such a delightful patio. I just started to build one using travertine rock and it's a killer project. I can't wait to be finished.
ReplyDeleteI cannot believe it...here I was looking for garden edging and found this!!
ReplyDeleteI have a similar under the trees area, which I am trying to pave with 200 odd square pavers I have lying around.
The area is slopey and so I am trying to flatten it out. However, now that I saw your design, I shall try and make a proper paved area rather than plonking them straight on in a boring fashion.
Would you mind if I send you photos of the area I am trying to pave, for some dos and donts and guidance? If so, please send me your details and i will send the photos.
I love this patio. I've been hoping to find some concrete patio pavers to redo my old patio. It would be wonderful to have a nice patio again.
ReplyDeleteSusan Hirst | http://www.sterlinglandscape.com/residential-landscape.shtml
OMG! You did it YOURSELF? You are a very talented person! Congratulations, it looks wonderful - sophisticated and cheerful!!!
ReplyDeleteReally Excellent blog, courtyard looks very pleasant, you have done wonderful job it seems your creativity. Thanks for sharing this. Non Explosive Cracking Agent
ReplyDeleteLove your photos of the patio in progress. The end product looks amazing. Wish I was that patient and talented to put something like this together. Thank you for sharing your awesome patio with everyone. http://cottonwoodland.com/pavers-and-flagstone/
ReplyDelete